Brakes Explained
Waller BMX - Brakes Explained
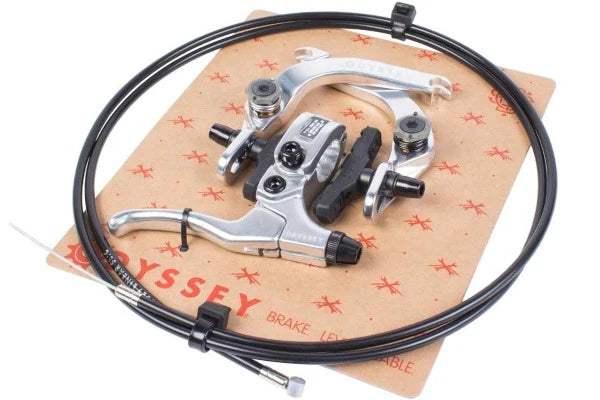
Brakes can be quite confusing especially when trying to set them up for the first time. Here in our BMX guide we’ve tried to explain all the components and how to set them up so you get a lovely working BMX brake. There are a few different types of brakes commonly used on BMX bikes today they are - U-Brakes, V-Brakes and a horse-shoe type brake which are usually fitted to the front as standard on complete bikes. They’re all setup different and we’ll try and show this in our demo videos.

Mounts - The different mount types for frames i.e removeable mounts may mount to the frame differently but the end result is still the same. The brake lug types most commonly used today are - M8 type, M6 through bolt type (Neil Wood) and the M10 type which comes on some Premium and Haro bikes.
M8 brake lugs tend to be used by brands such as Sunday Bikes, Total BMX and Federal whereas the M6 type which works slightly differently due to the lug being loose until you tighten the through bolt is used by brands such as Fitbikeco, Cult, BSD and S&M.
Gyro - A gyro brake takes much more setting up and maintaining due to the many points of adjustment and individual cables being pulled each time you brake. Gyro brakes allow you rotate the handlebars 360 degrees without tangling cables. This is great for riders who do lots of barspins, tailwhips or decades etc. We’ve made a video below which demonstrates how to setup a gyro brake.
Straight pull - These are the most common type of BMX brake as come fitted on most complete bikes. A straight pull is a quick and effective setup where the cable runs from the ever and into the straddle bridge which holds the straddle cable linking into the brake caliper. A straight pull brake won’t work as well once rotating the bars which is why some riders who occasionally bar spin would ride a cable called an Odyssey Linear cable. This cable has an extra outer housing which prevents binding allowing the cable to move freely when bent.
Brake Pads - Whether you choose to run clear or black pads there is a difference in performance when braking. Clear pads tend to be as softer compound and therefore when braking grip the rim more which can cause a loud squeal. Black brake pads tend to a harder compound and don’t usually squeal as much.
Levers - Most aftermarket levers are hinged allowing you to remove the lever without taking your grip off the handlebars. Some of the cheaper levers won’t usually have this hinge and therefore you’ll need to remove the grip when taking it off.
